VStack, HStack, ZStack
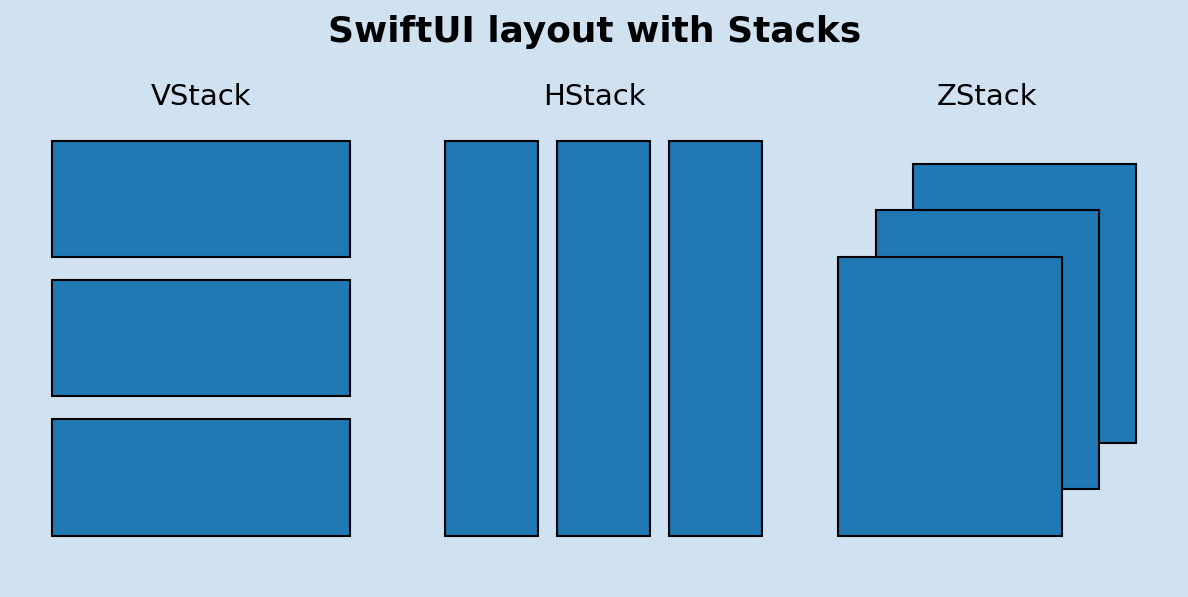
SwiftUI의 Stack은 UIKit에서 사용하던 Stack View와 유사한 점이 많다. Stack 안에서 먼저 선언된 View부터 위에서 아래로 배치하기 때문에 코드의 순서가 중요하다.
VStack은 내부에 선언된 View들을 Top에서 Bottom으로 배치하는 View로,
HStack은 내부에 선언된 View들은 Leading(왼쪽)에서 Trailing(오른쪽)으로 배치하는 View다.
ZStack은 내부에 선언된 View들을 모두 겹쳐서 배치한다. 먼저 선언된 View가 뒤로 밀리는 구조다.
@AppStorage
@AppStorage는 UIKit에서 사용하던 UserDefault와 유사하다. @AppStorage("고유 ID") 에 있는 고유 ID 부분을 통해 식별할 수 있고, 앱의 전체 범위에서 사용할 수 있다.
편리해보이지만 @AppStorage는 데이터 추출에 취약하므로, 개인 데이터를 저장하는 것은 적합하지 않다.
Animation
ZStack {
            if isOnboardingViewActive { OnboardingView() }
            else { HomeView() }
        }
        .animation(.easeOut(duration: 0.4), value: isOnboardingViewActive)
이런 식으로 view의 뒤에 .animation()을 붙여 사용한다.
.animation()의 속성으로는 .easeIn, .easeOut, .default, .easeInOut 등이 있고, 커스텀도 가능하다.
Animation은 쓸 말이 많지만 ㅜ 다음에 따로 포스팅해야겠다.
DragGesture
Image("character-1")
                        .resizable()
                        .scaledToFit()
                        .opacity(isAnimating ? 1 : 0)
                        .animation(.easeOut(duration: 0.5), value: isAnimating)
                        .offset(x: imageOffset.width * 1.2, y: 0)
                        .rotationEffect(.degrees(Double(imageOffset.width / 20)))
                        .gesture(
                            DragGesture()
                                .onChanged { gesture in
                                    if abs(imageOffset.width) <= 150 { // 사용자가 왼쪽으로 이미지를 드래그하면 abs는 절댓값을 반환하기 때문에 양수로 반환
                                        // 이미지가 화면을 벗어나게 하는 것을 방지
                                        imageOffset = gesture.translation // gesture.translation은 드래그 제스처의 시작부터 현재 이벤트까지 전체 움직임에 관한 필수 정보를 제공함

                                        withAnimation(.linear(duration: 0.25)) {
                                            indicatorOpacity = 0
                                            textTitle = "Give."
                                        }
                                    }
                                }
                                .onEnded { _ in // 애니메이션이 끝나면
                                    imageOffset = .zero // 다시 제자리로 오게 함

                                    withAnimation(.linear(duration: 0.25)) {
                                        indicatorOpacity = 1
                                        textTitle = "Share."
                                    }
                                }
                        ) //: GESTURE
                        .animation(.easeOut(duration: 1), value: imageOffset) // 다시 제자리로 돌아갈 때 서서히 돌아가게 하는 애니메이션 적용
드래그 관련 액션 이벤트를 생성할 때 사용한다. View 프로토콜을 따르고 있는 모든 곳에 .gesture() 를 붙여 사용할 수 있는데, 이 때 .gesture() 안에 들어가는 인스턴스로 사용되는 게 DragGesture() 다.
DragGesture() 에 onChanged, onEnded 를 붙여 사용할 수 있다.
UINotificationFeedbackGenerator
let hapticFeedback = UINotificationFeedbackGenerator()

hapticFeedback.notificationOccurred(.success)

hapticFeedback.notificationOccurred(.warning)
작업의 성공이나 실패를 알릴 때 사용한다. 이를 이용해서 햅틱 피드백을 구현할 수 있다. .success, .warning, .error 반응이 있고,
.success는 점점 커지는 반응을, .warning은 점점 약해지는 반응을, .error는 여러 번 울리는 반응을 구현한다.
참고자료
https://swdevnotes.com/swift/2021/layout-stacks-swiftui/
https://babbab2.tistory.com/160
https://declan.tistory.com/31
https://ios-development.tistory.com/1129
https://ios-development.tistory.com/1316